Assignments October 2-5

  • Homecoming Photos – Due Monday before class is over

Blog post should be titled “Homecoming Photos” put photos in a gallery 2×4 (if you take the extra credit images put them in the same blog post and you will just have more rows), title each photo in the caption area.

  • Grand Landscape –  Due Thursday before class is over

We will watch a video on how to think artistically while taking landscapes, then we will watch a video on grand landscape. We will take photographs of the Grand Landscape. Create Grand Landscape photographs that include the sky. Most, or all, of the scene should be in focus. Use the Rule of Thirds to compose the images, placing the horizon on the upper line in one variation and on the lower line in another. Depending on which line you use, this is a way to shift the emphasis from the land to the sky or vice versa. You will upload your best 6 photos to your blog on Thursday after you have edited the photos. Crop out any unwanted background information, change the colors (upload at least one photo in black and white), and use any other editing to help the emphasis and focus of the photo. Your blog post will be titled “Grand Landscape Photos.” Gallery, 3×2.

  • Finding Hidden Faces Due Thursday before class is over

When taking photographs, and especially when you first start out, it’s all too easy just to grab interesting images without really thinking about what you’re seeing.

Focused looking is an exercise which encourages photographers to consider their subjects carefully by asking them to create a series of photographs around a single theme. It’s great for students, as it helps them to focus on a specific subject through the camera lens and think more about the composition of the image.

Humans have an uncanny ability to recognize faces, and face-like patterns, wherever we see them. Scientifically, the phenomenon of automatically recognizing faces is called ‘facial pareidolia’, but in simple terms it means that we see faces wherever we look, even when there aren’t any.

This makes a great focused looking exercise, because it perfectly encapsulates the idea of looking beyond what you see to find deeper meaning in your images.

For some great examples of hidden face pictures, take a look at this Behance gallery by Hilde Maassen.

For the project, you will find hidden faces in NATURE. You will upload your best 3 photos to your blog as “Hidden Faces” in a gallery 3×1, title the images in the caption area. Below is an example.

Assignments September 25-28

    • Comments 3 – Due Monday before class is over
    Comment on your favorite four photos from the zoo photos. Please go through different student’s work to view more than four. Your comments need to include the photography and art language that we have talked about so far. This is not a one word or one sentence comment. Take your time and think about the other person’s work, what spoke to you, what did you like, what could be included to make the photo more dynamic, etc. Make sure that your comments are thought provoking and helpful. Type out your comments on four of your favorite photos on the blog. Then in Microsoft Word, copy each of your comments and the photo that you commented on, include the photographers name, and upload your word document to your blog as Comments 3.
    • Phoetry – Due Wednesday before class is over

    Phoetry is the combination of poetry and photography. Poetry is sometimes hard to understand. Digital photography can help make abstract poems more concrete. You will illustrate a poem with pictures. Select a short poem, type up your poem and separate them into stanzas in Powerpoint; each stanza would be a separate slide. You will go out and take photos to illustrate the words for each stanza. Change the font for the poem to go along with the words or the photos that you choose. This will be due on Wednesday before class is over. Please name the blog post “Phoetry.”

  • Homecoming Photos – Due Monday October 2nd

Take photos of homecoming activities all week. You need to include your best two of the following:

Lunchtime activities

Dress up days

Carnival

Assembly

For extra credit you can also include your best two of the following:

Parade

Sports events

Dummy Hunt

Bonfire

Powderpuff

Crowning

Dance

Monday October 2nd you will edit and upload these photos. Blog post should be titled “Homecoming Photos” put them in a gallery 2×4 (if you take the extra credit images put them in the same blog post and you will just have more rows), title each photo in the caption area.

Assignments September 25-28

    • 10 Photograph Photo Essay – Due Thursday 

Photo essays tell a story in pictures, and there are many different ways to style your own photo essay. With a wide range of topics to explore, a photo essay can be thought-provoking, emotional, funny, unsettling, or all of the above, but mostly, they should be unforgettable.

A photographic essay is a form of visual storytelling, a way to present a narrative through a series of images. A great photo essay is powerful, able to evoke emotion and understanding without using words. A photo essay delivers a story using a series of photographs and brings the viewer along your narrative journey.

You will create a photo essay about a “ PERSON…PLACE… or THING.

For example: Day-in-the-life photo essay: These kinds of photo essays tell the story of a day in the life of a particular subject. They can showcase the career of a busy worker or struggling artist, capture parents’ daily chores and playtime with their children, or memorialize the routine of a star high school athlete. A day-in-the-life photo series can be emotionally evocative, giving viewers an intimate glimpse into the world of another human being.

4 Tips for Creating a Photo Essay

  • Creative photography can be fun, sentimental, eye-opening, or gut-wrenching. It can expose a truth or instill a sense of hope. With so many possibilities to share a good photo essay, it’s important to keep the following tips in mind:
  • Do your research. There may be many types of photo essay topics available, but that doesn’t mean your specific idea hasn’t already been tackled by a professional photographer. Look up the best photo essays that have already been done on your topic to make sure the narrative can be executed in a new and interesting way.
  • Follow your instincts. Take photos of everything. Overshooting can be helpful. You never know what you’ll need, so the more coverage you have, the better.
  • Only use the best images. From your lead photo to the final photo, you’re creating a visually vivid story. However, if you use too many images, you risk diluting the impact of your message. Only include the key photos necessary.
  • Be open-minded. Your project may evolve past its initial concept, and that’s okay. Sometimes a photo essay evolves organically, and your job as a photojournalist is to extract the right narrative from the images you’ve captured—even if it wasn’t the original idea.

The photo essay will consist of 10 total photos and uploaded to your blog. Also, you will include a short description of the subject you are documenting. One paragraph minimum. Title your blog post “Photo Essay.” Using Adobe Express, create a collage with your ten images. Below is an example. 

  • Homecoming Photos – Due Monday October 2nd

Take photos of homecoming activities all week. You need to include your best two of the following:

Lunchtime activities

Dress up days

Carnival

Assembly

For extra credit you can also include your best two of the following:

Parade

Sports events

Dummy Hunt

Bonfire

Powderpuff

Crowning

Dance

Monday October 2nd you will edit and upload these photos. Blog post should be titled “Homecoming Photos” put them in a gallery 2×4 (if you take the extra credit images put them in the same blog post and you will just have more rows), title each photo in the caption area.

Assignments September 18-21

  • Zoo Photos – Due Tuesday before class is over 

While at the zoo think about different viewpoints, close up, angles, and more. These images can range from full body shots to head shots. You can choose to show the entire animal in relation to its zoo environment, which can resemble its natural environment, or you can closely frame the animal’s head, turning the image into an informal portrait. Take a lot of photographs so that you can decide which your best 6 photos are. Edit and upload the best 6 to your blog and name the post “Zoo Photos.” Put it in a gallery 3×2 and caption each image.

  • 10 Photograph Photo Essay – Due Thursday 

Photo essays tell a story in pictures, and there are many different ways to style your own photo essay. With a wide range of topics to explore, a photo essay can be thought-provoking, emotional, funny, unsettling, or all of the above, but mostly, they should be unforgettable.

A photographic essay is a form of visual storytelling, a way to present a narrative through a series of images. A great photo essay is powerful, able to evoke emotion and understanding without using words. A photo essay delivers a story using a series of photographs and brings the viewer along your narrative journey.

You will create a photo essay about a “ PERSON…PLACE… or THING.

For example: Day-in-the-life photo essay: These kinds of photo essays tell the story of a day in the life of a particular subject. They can showcase the career of a busy worker or struggling artist, capture parents’ daily chores and playtime with their children, or memorialize the routine of a star high school athlete. A day-in-the-life photo series can be emotionally evocative, giving viewers an intimate glimpse into the world of another human being.

4 Tips for Creating a Photo Essay

  • Creative photography can be fun, sentimental, eye-opening, or gut-wrenching. It can expose a truth or instill a sense of hope. With so many possibilities to share a good photo essay, it’s important to keep the following tips in mind:
  • Do your research. There may be many types of photo essay topics available, but that doesn’t mean your specific idea hasn’t already been tackled by a professional photographer. Look up the best photo essays that have already been done on your topic to make sure the narrative can be executed in a new and interesting way.
  • Follow your instincts. Take photos of everything. Overshooting can be helpful. You never know what you’ll need, so the more coverage you have, the better.
  • Only use the best images. From your lead photo to the final photo, you’re creating a visually vivid story. However, if you use too many images, you risk diluting the impact of your message. Only include the key photos necessary.
  • Be open-minded. Your project may evolve past its initial concept, and that’s okay. Sometimes a photo essay evolves organically, and your job as a photojournalist is to extract the right narrative from the images you’ve captured—even if it wasn’t the original idea.

The photo essay will consist of 10 total photos and uploaded to your blog. Also, you will include a short description of the subject you are documenting. One paragraph minimum. Title your blog post “Photo Essay.” Using Adobe Express, create a collage with your ten images. Below is an example. 

Assignments September 18-21

  • Zoo Photos – Due Tuesday before class is over While at the zoo think about different viewpoints, close up, angles, and more. These images can range from full body shots to head shots. You can choose to show the entire animal in relation to its zoo environment, which can resemble its natural environment, or you can closely frame the animal’s head, turning the image into an informal portrait. Take a lot of photographs so that you can decide which your best 6 photos are. Edit and upload the best 6 to your blog and name the post “Zoo Photos.” Put it in a gallery 3×2 and caption each image.
  • Lighting: Due Thursday Before Class is Over
Watch videos on this Link, this one and this one to help understand more about lighting while photographing

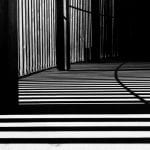
Take photos to show the use of lighting. You will edit and post to your blog your best 6 photos. Title the blog post “Lighting.” Make sure to put this in a gallery of 3×2 and title each photo in the caption area. Below are some examples.


Assignments September 11-14

  • Lightroom Tutorial – Due Wednesday before class is over

Edit a photo in Lightroom, during the tutorial, using one of your photos that you have taken in class so far. Title the blog post “Lightroom.” Explain what you changed, and why you changed it/why it looks better. Include and title the original image and the edited image. 

Lightroom Overview

Lightroom Edit and Organize Photos

  • Shallow Depth of Field  – Due Thursday before class is over 

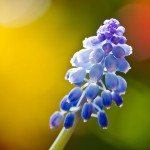
Read this article that explains more on shallow depth of field and how to take great photos using this technique. Then you will take photos that show good use of shallow depth of field. The subject can be anything of your choice. You will submit your best 3 photos that show this technique. Blog post title should be “Shallow Depth of Field.” Make sure to title all photos in the captions box and put the photos in a gallery 3×1. Below is an example. 

  • Man vs Nature – Due Thursday before class is over 

You will take photos that show man vs nature. Be creative with the topic and show what the topic makes you think of. You will submit your best 3 photos that show this technique. Blog post title should be “Man vs Nature.” Make sure to title all photos in the captions box and put the photos in a gallery 3×1. Below is an example. 


Assignments September 11-14

  • Comments 2 – Due Monday before class is over

Comment on your favorite four photos from the photo 1 elements of art or principles of design photos or advanced commercial photos or sound photos. Please go through different student’s work to view more than four. Your comments need to include the photography and art language that we have talked about so far. This is not a one word or one sentence comment. Take your time and think about the other person’s work, what spoke to you, what did you like, what could be included to make the photo more dynamic, etc. Make sure that your comments are thought provoking and helpful. Type out your comments on four of your favorite photos on the blog. Then in Microsoft Word, copy each of your comments and the photo that you commented on, include the photographers name, and upload your word document to your blog as Comments 2.

  • Lightroom Tutorial – Due Wednesday before class is over

Edit a photo in Lightroom, during the tutorial, using one of your photos that you have taken in class so far. Title the blog post “Lightroom.” Explain what you changed, and why you changed it/why it looks better. Include and title the original image and the edited image. 

Lightroom Overview

Lightroom Edit and Organize Photos

  • Composition Photos – Due Thursday before class is over

We will go over more with the composition rules in class using the videos below. You will take four photos at 50mm to show the use of composition and how it will change the look of your photo and your thought process while taking photos. Upload your best four photos to your blog as a gallery 4×1, blog post title should be “Composition Photos.”

Composition Video 1

Composition Video 2

Composition Project


Assignments September 4-7

  • Commercial Writing – Due Tuesday Before Class is Over

On your blog,  post 3 commercial photos by a working commercial photographer (look on this website to understand what commercial photography is, there are a lot of other sites as well.). In 250 words, write about: what type of commercial photography is each image, what stood out that made you choose the image, and what did the photographer do well to “sell” the item. Include in the caption area the photographer’s name for each photo. Title your blog post “Commercial Writing.” 

  • Commercial Photography: Due Wednesday Before Class is Over

Photograph 4 different commercial shots. Your commercial photography can be in any of these categories: Sports, food, product, fashion, wedding/event, and wildlife. Make sure that you research the topic/s you choose before so that your images are worthwhile. Below is a link that explains and shows examples and the photography planning sheet that you will need to fill out and turn in with your photographs. Post all four advertising photos to your blog with titles as a gallery (2×2), title each image in the caption area, blog post should be titled “Advertising Photos.” Below are examples from past student work.

  • Sounds in Photography – Due Thursday before class is over

Pick 2 sound words, turn in 2 photossnap, crackle, pop, whistle, rustle, swoosh, bass, crescendo, resonance, boom, echo, screech, rattle, thud, scream, click, shout, whistle, twack, shhhh, shush, tsk tsk, squeak, creak, symphony, boing, chime, ring, silence, tap, knock, hiss 

Instructions: do NOT photograph something making that sounds, rather think about the sound, figure out how the noise would LOOK, and photograph something that looks how the sounds feels.

Title your blog post “Sounds in Photography,” title each photograph in the caption area. The two photos should be in a gallery.

Assignments September 4-7

  • Comments 1 – Due Monday before class is over

Comment on your favorite four photos from the advanced photos class for their shadow photos and/or photography 1 texture photos. Please go through different student’s work to view more than four. Your comments need to include the photography and art language that we have talked about so far. This is not a one word or one sentence comment. Take your time and think about the other person’s work, what spoke to you, what did you like, what could be included to make the photo more dynamic, etc. Make sure that your comments are thought provoking and helpful. Type out your comments on four of your favorite photos on the blog. Then in Microsoft Word, copy each of your comments and the photo that you commented on, include the photographers name, and upload your word document to your blog as Comments 1.

Elements of Art Photos – Due Thursday before class is over

Read the following about the The_Elements_of_Art and this article

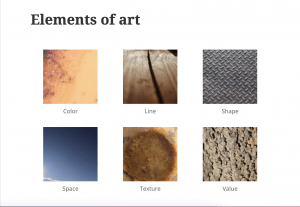
Take photos to show the use of each of the elements of art. Make a gallery 3×2 of images in your blog. Post your gallery, write a title in the caption area saying which element of art each photo is. You should have a photo for line, shape, color, space, texture, and pattern (6 photos total), and title the post “Elements of Art Photos.” Edit your photos before uploading them to your blog. Below is how your post should look when submitting.

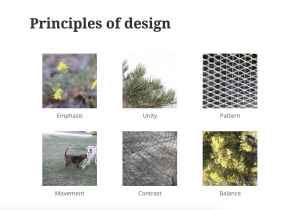
Principles of Design Photos – Due Thursday before class is over

Read the following about the The_Principles_of_Design and this article.

Due Thursday before class is over. Take photos to show the use of each of the principles of design. Make a gallery 3×2 of images in your blog. Post your gallery, write a title in the caption area saying which element of art for each photo. You should have a photo for balance, pattern, unity, movement, contrast and emphasis (6 photos total), and title the post “Principles of Design Photos.” Edit your photos before uploading them to your blog. Below is how your post should look when submitting.

This article explains both the elements and the principles.


Assignments August 28-31

  • PROJECT CHOICES – Due Thursday before class is over

Choose one of the choices below for this week (upload to your blog with the title of the choice as your blog post, six photos for your choice with titles for each, do as a photo gallery 3×2)

Shoot from the Hip: Shooting from the hip is a great technique and makes a great basis for a street photography project. With your camera at waist level, you shoot upwards, without looking through the viewfinder – so your subjects don’t know they are being photographed and you are rewarded with genuinely candid photographs of people, with the added bonus of an interesting perspective.

The Apple:  Each of you will shoot an apple. In your own way.

Environmental Portraits (with multiple flashes): Take several portraits of someone in their environment, doing what it is they do. Post your favorites and write a good short story about your subject and what they DO.

Musician: Studio Portraits with strobes of musician/musicians in their element.

Couples: Photograph two people and explore the relationship between the two. Try to communicate it visually. In studio or on location.

Animalography: Shoot some great photos of adorable (or strange looking) animals. Possibly use a wide angle lens and get close up for some humorous distortion.

Body Art: Photograph body art and make an eye-catching series to document one of the biggest trends of the decade: TATOOS. You can use your smartphone camera and apps for this project. Be sure to include the app (s) you used to make your creation. Credit to the tatoo artists, if possibly.

Architecture: Go shoot the buildings around your city at all different times of the day.  I bet you’ll find some interesting buildings that you’d never noticed before.

Window and Door Series: Windows and doors are everywhere: we are bombarded with them on a daily basis. Peeling paint, smashed windows, ornate knockers and wonderful windows boxes – this project is sure to yield a great set of photographs

  • Rye High School’s Website Writing – Due Wednesday before class is over

Write a paragraph explaining what you like, dislike, and would like to see added to the website. Make sure that you look through the different tabs on the school website and answer in complete sentences. Submit as a blog post (don’t put a Word Document) and title the blog post “RHS Website Writing.” This is the school website link.

  • Rye High School’s Website – Due Thursday before class is over

Rye High School’s website images need to be updated and changed. You need to take photos of the different classes and projects and things that they do in their class. Please include photos from music, art, ag, project lead the way (Ressel), etc. You will upload your best 9 photos to your blog as a gallery 3×3 by Thursday, the blog post should be titled “Website.” In the caption area title each image.